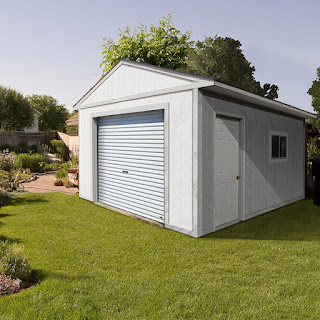
8x8 Bike Shed Plans: Store and Protect Your Bicycles Safely

Introduction: The Need for Secure Bicycle Storage
The increasing popularity of cycling as a mode of transportation and recreation necessitates secure and reliable bicycle storage solutions. An unprotected bicycle is vulnerable to theft, vandalism, and the damaging effects of inclement weather. A dedicated bike shed offers a significant improvement in protection, preserving the value and longevity of your investment. This article provides comprehensive plans for constructing an 8x8 foot bike shed, outlining the materials, tools, and step-by-step instructions required for a successful build. The design prioritizes both security and practicality, offering ample space for multiple bicycles and accommodating various storage needs.
Design Considerations for an 8x8 Bike Shed
Before commencing construction, careful consideration of several key design elements is crucial to ensure the shed meets your specific requirements and local building regulations. These factors include:

Site Selection and Preparation
Choosing the appropriate location is paramount. Select a level, well-drained area with easy access. Consider proximity to your home for convenient access and visibility. Clear the site of any obstructions, including vegetation and debris, and ensure the ground is suitably compacted to provide a stable foundation. Proper site preparation is fundamental to a stable and long-lasting structure.
Foundation Options
Several foundation types are suitable for an 8x8 bike shed, each offering varying degrees of complexity and permanence. Options include:
- Concrete Slab: Provides the most robust and durable foundation, ideal for heavier sheds and areas prone to flooding or frost heave. Requires professional pouring or a significant amount of DIY experience.
- Concrete Pier Blocks: A more cost-effective and simpler alternative to a concrete slab. Concrete blocks are placed at the corners and midpoints of the shed's perimeter, providing support for the base frame.
- Gravel Base: Suitable for lighter sheds in well-drained areas. A layer of compacted gravel provides drainage and a relatively level surface for the base frame.
The chosen foundation will influence the overall construction time and material costs. Consult local building codes for specific requirements regarding foundation types.
Material Selection: Durability and Aesthetics
The choice of building materials significantly impacts the shed's longevity, aesthetics, and cost. Popular options include:
- Pressure-Treated Lumber: Offers excellent durability and resistance to rot and insect damage. It's a cost-effective choice for framing and cladding.
- Cedar or Redwood: Naturally resistant to rot and insects, offering a more aesthetically pleasing appearance than pressure-treated lumber. However, it's generally more expensive.
- Metal Cladding: Provides exceptional durability and security, resisting damage from harsh weather and potential break-ins. Various styles and colors are available.
- Vinyl Siding: Low-maintenance and aesthetically pleasing, offering a variety of colors and styles. However, it may not offer the same level of durability as metal or pressure-treated lumber.
Roofing Considerations
The roof design should effectively shed water and snow, protecting the bicycles inside from the elements. Common roofing options include:
- Asphalt Shingles: A cost-effective and readily available option, providing good weather protection.
- Metal Roofing: Highly durable and long-lasting, offering excellent protection against harsh weather conditions. It can be more expensive than asphalt shingles.
- Polycarbonate Roofing: Allows for natural light penetration while providing protection from the elements. It's a more expensive option but can enhance the shed's interior lighting.
Detailed Construction Plans: An 8x8 Bike Shed
The following steps outline the construction process for an 8x8 foot bike shed. Always consult local building codes and safety regulations before beginning construction.
Step 1: Foundation Construction
Following the chosen foundation method (described above), construct a level and stable base. This might involve excavating, pouring concrete, setting pier blocks, or creating a compacted gravel base. Ensure the base is plumb and level to prevent structural issues.
Step 2: Frame Construction
Construct the shed's frame using pressure-treated lumber or your chosen material. Cut and assemble the floor joists, wall studs, and roof rafters according to the dimensions. Ensure all joints are properly secured with screws or nails. Use appropriate bracing to ensure structural integrity.
Step 3: Cladding Installation
Install the chosen cladding material (pressure-treated lumber, metal, vinyl, etc.) onto the frame. Ensure proper overlapping and sealing to prevent water penetration. Install any windows or vents according to your design.
Step 4: Roofing Installation
Install the selected roofing material, ensuring proper overlap and sealing to prevent leaks. Consider adding flashing around chimneys or vents to further prevent water intrusion. Properly secure the roofing material to withstand wind and snow loads.
Step 5: Door and Security Features
Install a secure door with a sturdy lock to prevent unauthorized access. Consider adding additional security measures such as reinforced hinges and a high-quality lock. For enhanced security, install a padlockable hasp and staple on the door. A solid core door is recommended over a hollow core door.
Step 6: Interior Finishing
Finish the interior of the shed as needed. This might include adding shelving for accessories, hooks for hanging bikes, or a floor covering to protect against moisture and dirt. Consider painting the interior to enhance aesthetics and protect the wood.
Step 7: Final Inspection
Before using the shed, conduct a final inspection to ensure all components are securely fastened, the roof is waterproof, and the door operates smoothly and securely. Address any issues before storing bicycles.
Conclusion: A Secure and Functional Bike Shed
Constructing an 8x8 bike shed offers a practical and cost-effective solution for protecting your valuable bicycles. By following these detailed plans and carefully selecting materials, you can create a durable and secure storage solution that protects your bicycles from theft, vandalism, and the elements. Remember to prioritize safety throughout the construction process, adhering to all relevant building codes and safety regulations.
The addition of a well-constructed bike shed not only enhances the security of your bicycles but also improves the overall aesthetic appeal of your property. This investment in secure storage offers peace of mind and protects a significant investment. The relatively simple design outlined above, while adaptable to personal preferences, allows for a straightforward construction process yielding a highly functional and durable bike storage solution.